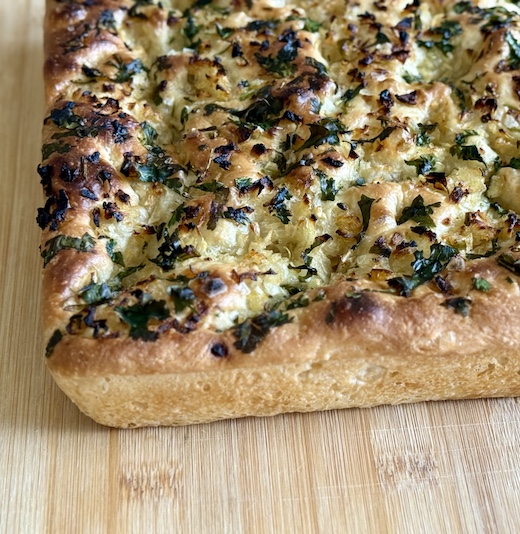
This bubbly, crisp focaccia is generously topped with chopped onions, green chilies, and a fragrant mix of fresh herbs. Easy to make and requiring no kneading, this recipe is perfect for both novice and seasoned bakers. While it does need a little attention every so often, most of the process simply involves letting the dough rest and rise. For the best results, use high-quality olive oil and don’t skimp on the toppings. Enjoy this focaccia fresh on the day it’s baked – delicious as is, lightly toasted, or in a panini for a truly tasty treat!
Burnt onion focaccia
Ingredients
Toppings
- 1 Onion medium sized, chopped finely
- 5 Thai chilies or 1 serrano pepper, chopped finely
- 1 Cup Cilantro Parsley, Dill, chopped finely. One or a combination of any of these herbs will do
- 1/2 tsp Flaky sea salt optional
- 2 tbsp Olive oil
Bread
- 360 g All purpose flour 3 cups
- 284 g Water 1 1/4 cups
- 7 g Active dry yeast
- 1 tsp Granulated sugar
- 2 tbsp Olive oil
- 9 g Salt
Equipment
- 1 9×9” baking pan, something with tall sides, such as a brownie pan
Instructions
- Heat the water until it is lukewarm to touch, 95F – 105F. Be careful not to heat the water beyond this temperature, or the yeast will not activate.
- Dissolve the sugar and yeast in the water and set aside to turn frothy.
- Meanwhile, measure out the flour and salt into a large bowl and stir to combine.
- When the yeast mixture turns frothy, add it to the dry ingredients along with 2 tbsp of olive oil.
- Using a spatula, or your hands, combine the wet and dry ingredients to form a soft dough. Make sure there are no dry bits of flour left.
- Cover and set aside for 30 minutes. This is the autolyse period, and allows the flour to absorb the moisture more thoroughly.
- After 30 minutes, do one set of stretches and folds. To do this, dip your fingers in a bowl of water and then pick up on section of the dough, stretch is up and fold it over towards the middle. Turn the bowl by 90 degrees and repeat again until you have stretched and folded 8-12 times.
- Using your hands or a dough scraper, gently flip the dough so the smooth side is facing up.
- Set aside, covered, for 15 minutes and repeat the stretch and fold process.
- Rest for another 15 minutes and repeat again. You will do a total of 4 sets of stretching and folding in this hour. By the end of the hour, the dough will have become stronger and smoother and look like it has built some structure.
- At this point, cover the dough and let it rise in a warm spot in your kitchen until it has doubled. I like to use a straight sided clear tub for this, so I can keep an eye on how much the dough has risen. Usually this takes about 45-60 minutes. The exact time needed for this first rise depends on the temperature, the yeast, and humidity in your kitchen.
- While the dough is rising, prep the baking pan. Grease the pan with non stick spray, or some olive oil. Cut a long piece of parchment paper, 5” wide and lay it in the middle of the pan so the sides overhang the top of the pan on either side. You are essentially creating a handle to lift the bread later.
- When the dough has doubled, transfer it to the baking pan carefully. Be careful not to deflate the dough too much. It is normal for some of the larger bubbles to defalate.
- Using your fingers, gently spread the dough until it covers most of the pan.
- Cover the pan with a tea towel and set aside for another 1 to 1.5 hours to rise again. The dough will rise up to fill the pan and look very bubbly on top.
- Preheat the oven to 475F.
- Carefully uncover the dough, and drizzle the remaining 2 tbsp of olive oil on top.
- Make indentations in the dough using your fingers. You should press gently, but firmly, down with all 5 fingers to make deep dimples in the dough. Be careful to not deflate the dough too much.
- Spoon the chopped onions, green chilis, and herbs on top of the dough.
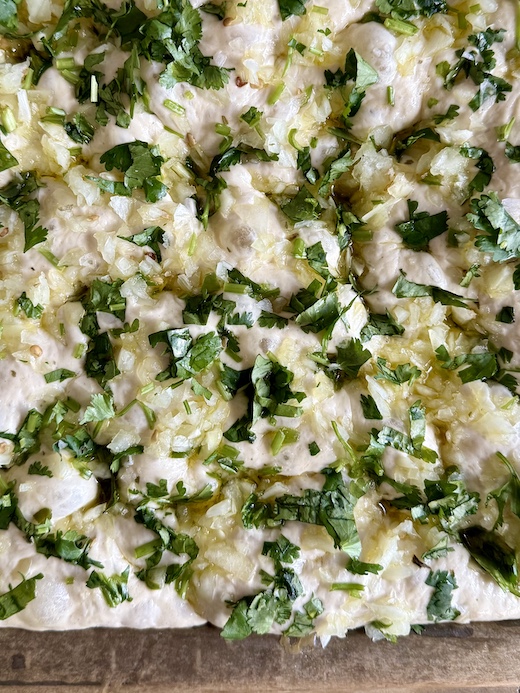
- Top with the flaky sea salt.
- Bake the focaccia for 18-20 minutes until the top is golden brown and a skewer inserted into the bread comes out clean.
- If necessary, you can give the top a bit of extra color by broiling for a minute. Be careful not to broil for too long and burn the bread!
- Remove the focaccia pan and turn off the oven.
- Using the paper handles, gently lift the bread from the pan and put it back directly on the oven rack for another 5-7 minutes to help the outer edges of the focaccia crisp up even more. Remove the paper once you have transfered the bread on to the rack.
- Remove the focaccia from the oven and cool on a wire rack.
Notes
Focaccia is best eaten the day of baking. However, it will stay fresh on the counter wrapped in plastic wrap for at least 2 days.